
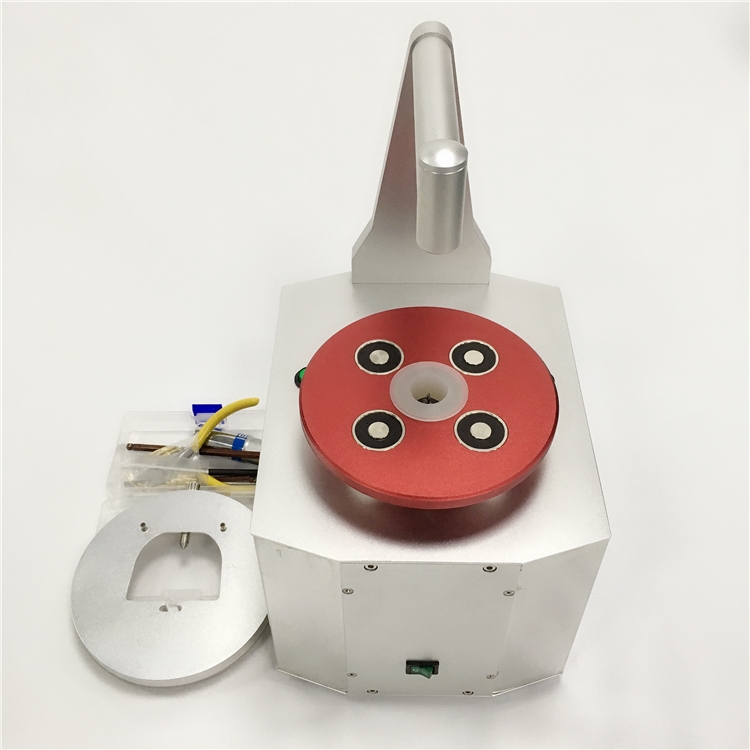
Introduction Of Pindex Dental System:
The dental pindex is the most important piece of equipment in dental clinics and laboratories, and it is used to drill small holes for various prosthesis and dental molds. This dental pindex system is the most ideal and precise method for fabricating removable dies. It comes with various advantages, and also the technique used in the system will be easy.
What is a Dental Pindex System?
The dental pindex system is used in dental laboratories to drill small holes, and the drilling units can be used for up to 15,000 RPMs. Because of this high drilling speed, it allows smooth continuous motion, and also it can able pinhole even in the hardest die stone. This is the simplest, most precise, and a new method for making an impression, and this is the most convenient process.
Most pinhole drilling units utilize the laser so that the drill hole can be positioned precisely. The depth of the drill can be controlled from 0 to 12mm. During drilling, there will be the accumulation of dust and debris which can be removed by using external suction so that both the equipment and drill holes can be kept clean.
In some dental pindex systems, such as giroform model system pindex, you will get the option of seating or standing position, which works via the tilt base, and also it offers superior ergonomic operation. So, before purchasing a dental pindex system you need to check the quality of the unit, maintenance cost, vendor support, and ease of use.
Process of Dental Pindex System:
Pindex dental machine is one of the working casts that work with the removable die. The dental pindex system consists of three important features;
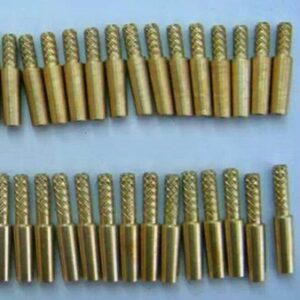
- A special drill press
- Brass dowels and plastic sleeves
- A stone cast trimmed to the horse-shoe shaped
The process of making the cast using the pindex system involves the following process;
- In the pindex system, the impression will be poured with the die-stone and the added stone will be 20mm beyond the edge of the tray. It will allow the impression to dry without adding any die-stone further
- Then, the cast should be allowed to sit for 60 minutes, and then remove
- Before trimming, it should be thoroughly wet cast so that the accumulation of the sled of prepared teeth will be prevented
- Then the bottom of the cast will be trimmed, and it is made into a flat surface
- The thickness should be adjusted, as the thickness from the base to the prepared finished line should be 15mm, and not more than that
- If you find any excess stone on the tongue or palate area then it should be removed
- The width of the faciolingual will be 10mm
Once the casting process has been finished, the next process is to drill a pinhole and this includes the following steps;
- The next step is to mark the desired location of the pins using a pencil on the occlusal surface of the teeth or the prepared cast
- In each die, there should be two pins; and also two pins for the pontic area, and two pins for the segment containing unprepared teeth
- Now, you need to place the cast on the worktable of the drill press, and you need to switch on the red pilot light
- With the help of the light beam, align the first pencil mark with the illuminated dot
- Now using both hands, you need to exert firm downwards by applying pressure on the cast using your thumb finger
- Now, raise the handlebar to slow so that the pressure and drill assembly move upwards and the pinholes can be cut
- After reaching a certain depth, the red light will go off
- The same procedure is repeated for each mark, and if you want to achieve effective and better results the damp should be slightly damped so that dust formation can be prevented
Even the dust can be removed by using compressed air and a brush, and even the debris in the hole can also be removed. The pinholes should be properly refined with a hand reamer, and before doing the cementation process, the seating of pins should be completed.
After that, the cementation process can be achieved by pouring the cyanoacrylate cement into the pins, and also making sure the cast is completely dried.
With the help of the cement, the short pins are placed on the palatal side, and then the longer pins should be placed on the facial side. This type of cementing will helps in the easy removal process.
Once the cement is dried, then place the plastic sleeves over the pins, and the flat sides of the bases should face each other. Then the petroleum jelly is used as a separating agent, and a thin coat is applied to the bottom of the cast. If you have applied excess then it can be removed by wiping it off so that the errors can be prevented, and also the repositioning of dies can also be prevented.
At the end of the short sleeves, place a small amount of the molten wax. This wax will help to prevent the sleeve from getting filled with stone when the base is poured. Then, in the long wax, run a strip of utility wax so that the die can be easily removed. On each end of the isolated pins, place a small ball of wax.
Pros and Cos:
Pros:
- Using the wax pattern, the fabrication can be easily obtained
- You can able to get a complete immobilization of the prepared tooth replica
- There will be no horizontal or vertical shifting
- Also, while casting you don’t need any other special equipment to complete the process
- Using the dental pindex system, you can able to get an accurate fabrication
Cons:
- If you prefer the multiple pouring method, then there will be some minor dimensional errors occurs
- Sometimes, the wax pattern can be manipulated from the working model to the die which can induce some stress
Pindex dental products reference source:
-
Product on sale
 Dental Dowel Pins With Spike For Dentures FabricationOriginal price was: $90.00.$79.00Current price is: $79.00.
 -
Product on saleDental Dowel Pins With Brass SleeveOriginal price was: $79.00.$68.00Current price is: $68.00.
-
Product on saleDental Dowel Twin PinsOriginal price was: $70.00.$56.00Current price is: $56.00.
-
Product on sale
 Dental Dowel Pins For Model ArticulationOriginal price was: $40.00.$33.00Current price is: $33.00.
 -
Product on saleDental Dowel Pin Sleeve With Plastic SleeveOriginal price was: $40.00.$33.00Current price is: $33.00.
-
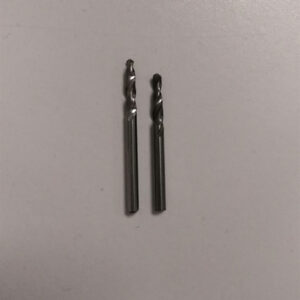
Product on saleDental Drills For PindexOriginal price was: $13.00.$7.00Current price is: $7.00.
-
Product on salePindex Dental Dowel Pins For SaleOriginal price was: $49.00.$28.00Current price is: $28.00.
-
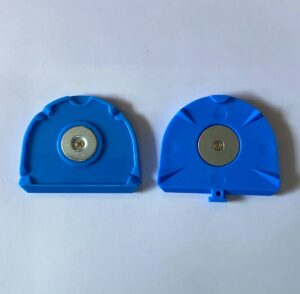
Product on saleZeiser Model System Pindex Dental Plates$0.80 – $2.00
-
Product on saleGiroform Model System Dental Plates$1.10 – $2.20
-
Product on saleAmann Girrbach Plates$0.80 – $2.00
-
Product on salePindex Dental MachineOriginal price was: $2,100.00.$1,306.00Current price is: $1,306.00.